
Requirements before getting started:
- User must have the privilege to manage statuses. To make this change, please read the tutorial "How to edit user privileges."
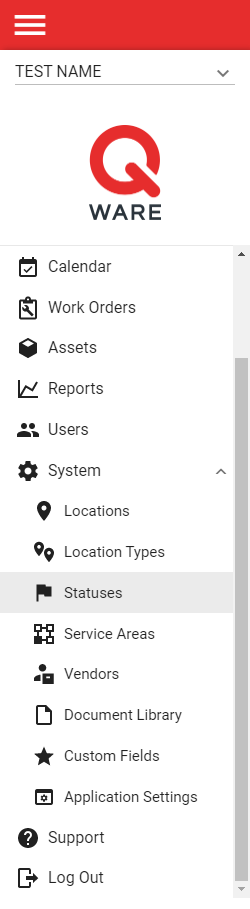
1. Log in to your Q Ware application and navigate to System -> Statuses.
2. From the status management interface, click the red create button at the bottom right hand side of the screen.

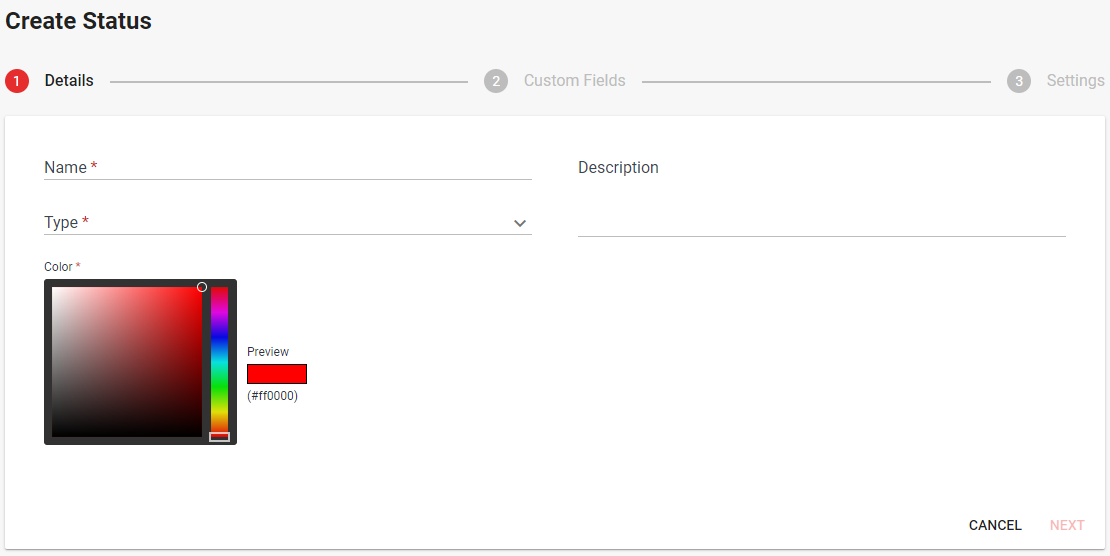
3. Complete each step of the status create form. Make sure to fill in all required fields. There are 3 steps which include:
- Details - the name, type, color, and description of the status
- Custom Fields (optional) - custom field layout associations per service area.
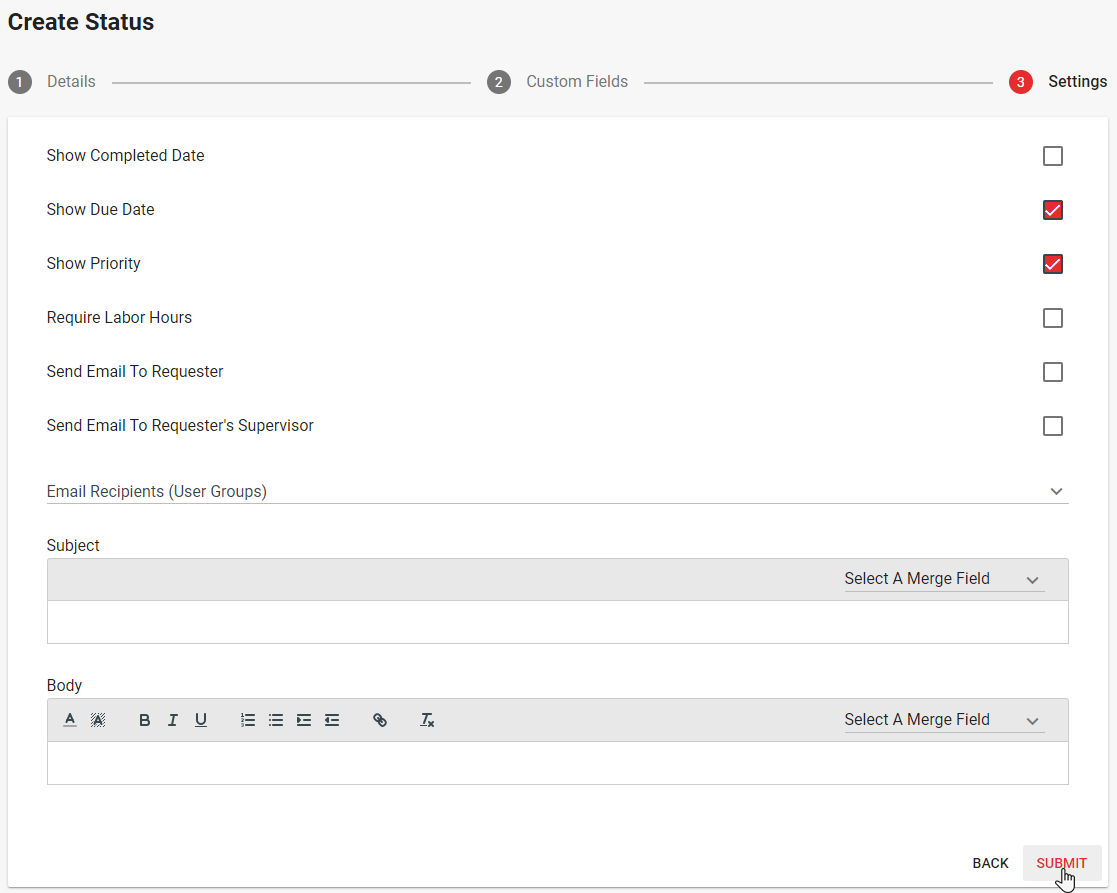
- Settings - the customization options for the status which include:
- Show Completed Date - whether to show the "Completed Date" field if the status type is "Work Orders"
- Show Due Date - whether to show the "Due Date" field if the status type is "Work Orders"
- Show Priority - whether to show the "Priority" field if the status type is "Work Orders"
- Require Labor Hours - whether labor hours are required to save a work order in the status
- Send Email To Requester - whether to send an email to the requester of a work order when saved in the status.
- Send Email to Requester's Supervisor - whether to send an email to the requester of a work orders supervisor when saved in the status
- Email Recipients - user groups to send an email to when a work order is saved in the status
- Subject - the subject of the email that will be sent when saved in the status (can include fields related to the status type selected)
- Body - the body of the email that will be sent when saved in the status (can include fields related to the status type selected)
4. Once completed, click submit to create the status and return to the status management interface.
Comments
0 comments
Please sign in to leave a comment.